Сonnect Jira to Power BI
Take advantage of Coupler.io to connect Jira to Power BI, even if coding isn't on your skills list. Take a few steps to collect data, organize it as you like, and apply various transformations to it. Get data-driven reports created for meaningful analytics.


Сonnect Jira to Power BI with Coupler.io to simplify reporting
Get and prepare data effortlessly
Export Jira to Power BI without being an expert in coding. Coupler.io is a user-friendly reporting automation platform that enables you to transform data in various ways, adjust a schedule for auto-refreshes, and pull records from numerous source applications.
Automate reporting tasks
Thanks to automated data imports from Jira to Power BI, you can reduce manual workload. Have your reports built in a matter of minutes and turn data into dynamic, insightful visualizations with our free templates for dashboard creation.
Stand out as a data-driven expert
Establish your credibility with clients and stakeholders through the timely delivery of data-powered reports. Coupler.io's analytics and automation will set you free from tedious reporting tasks and afford you more time to spend on strategic priorities.
Export data from Jira to alternative destinations


Quick start with Project Management dashboard templates
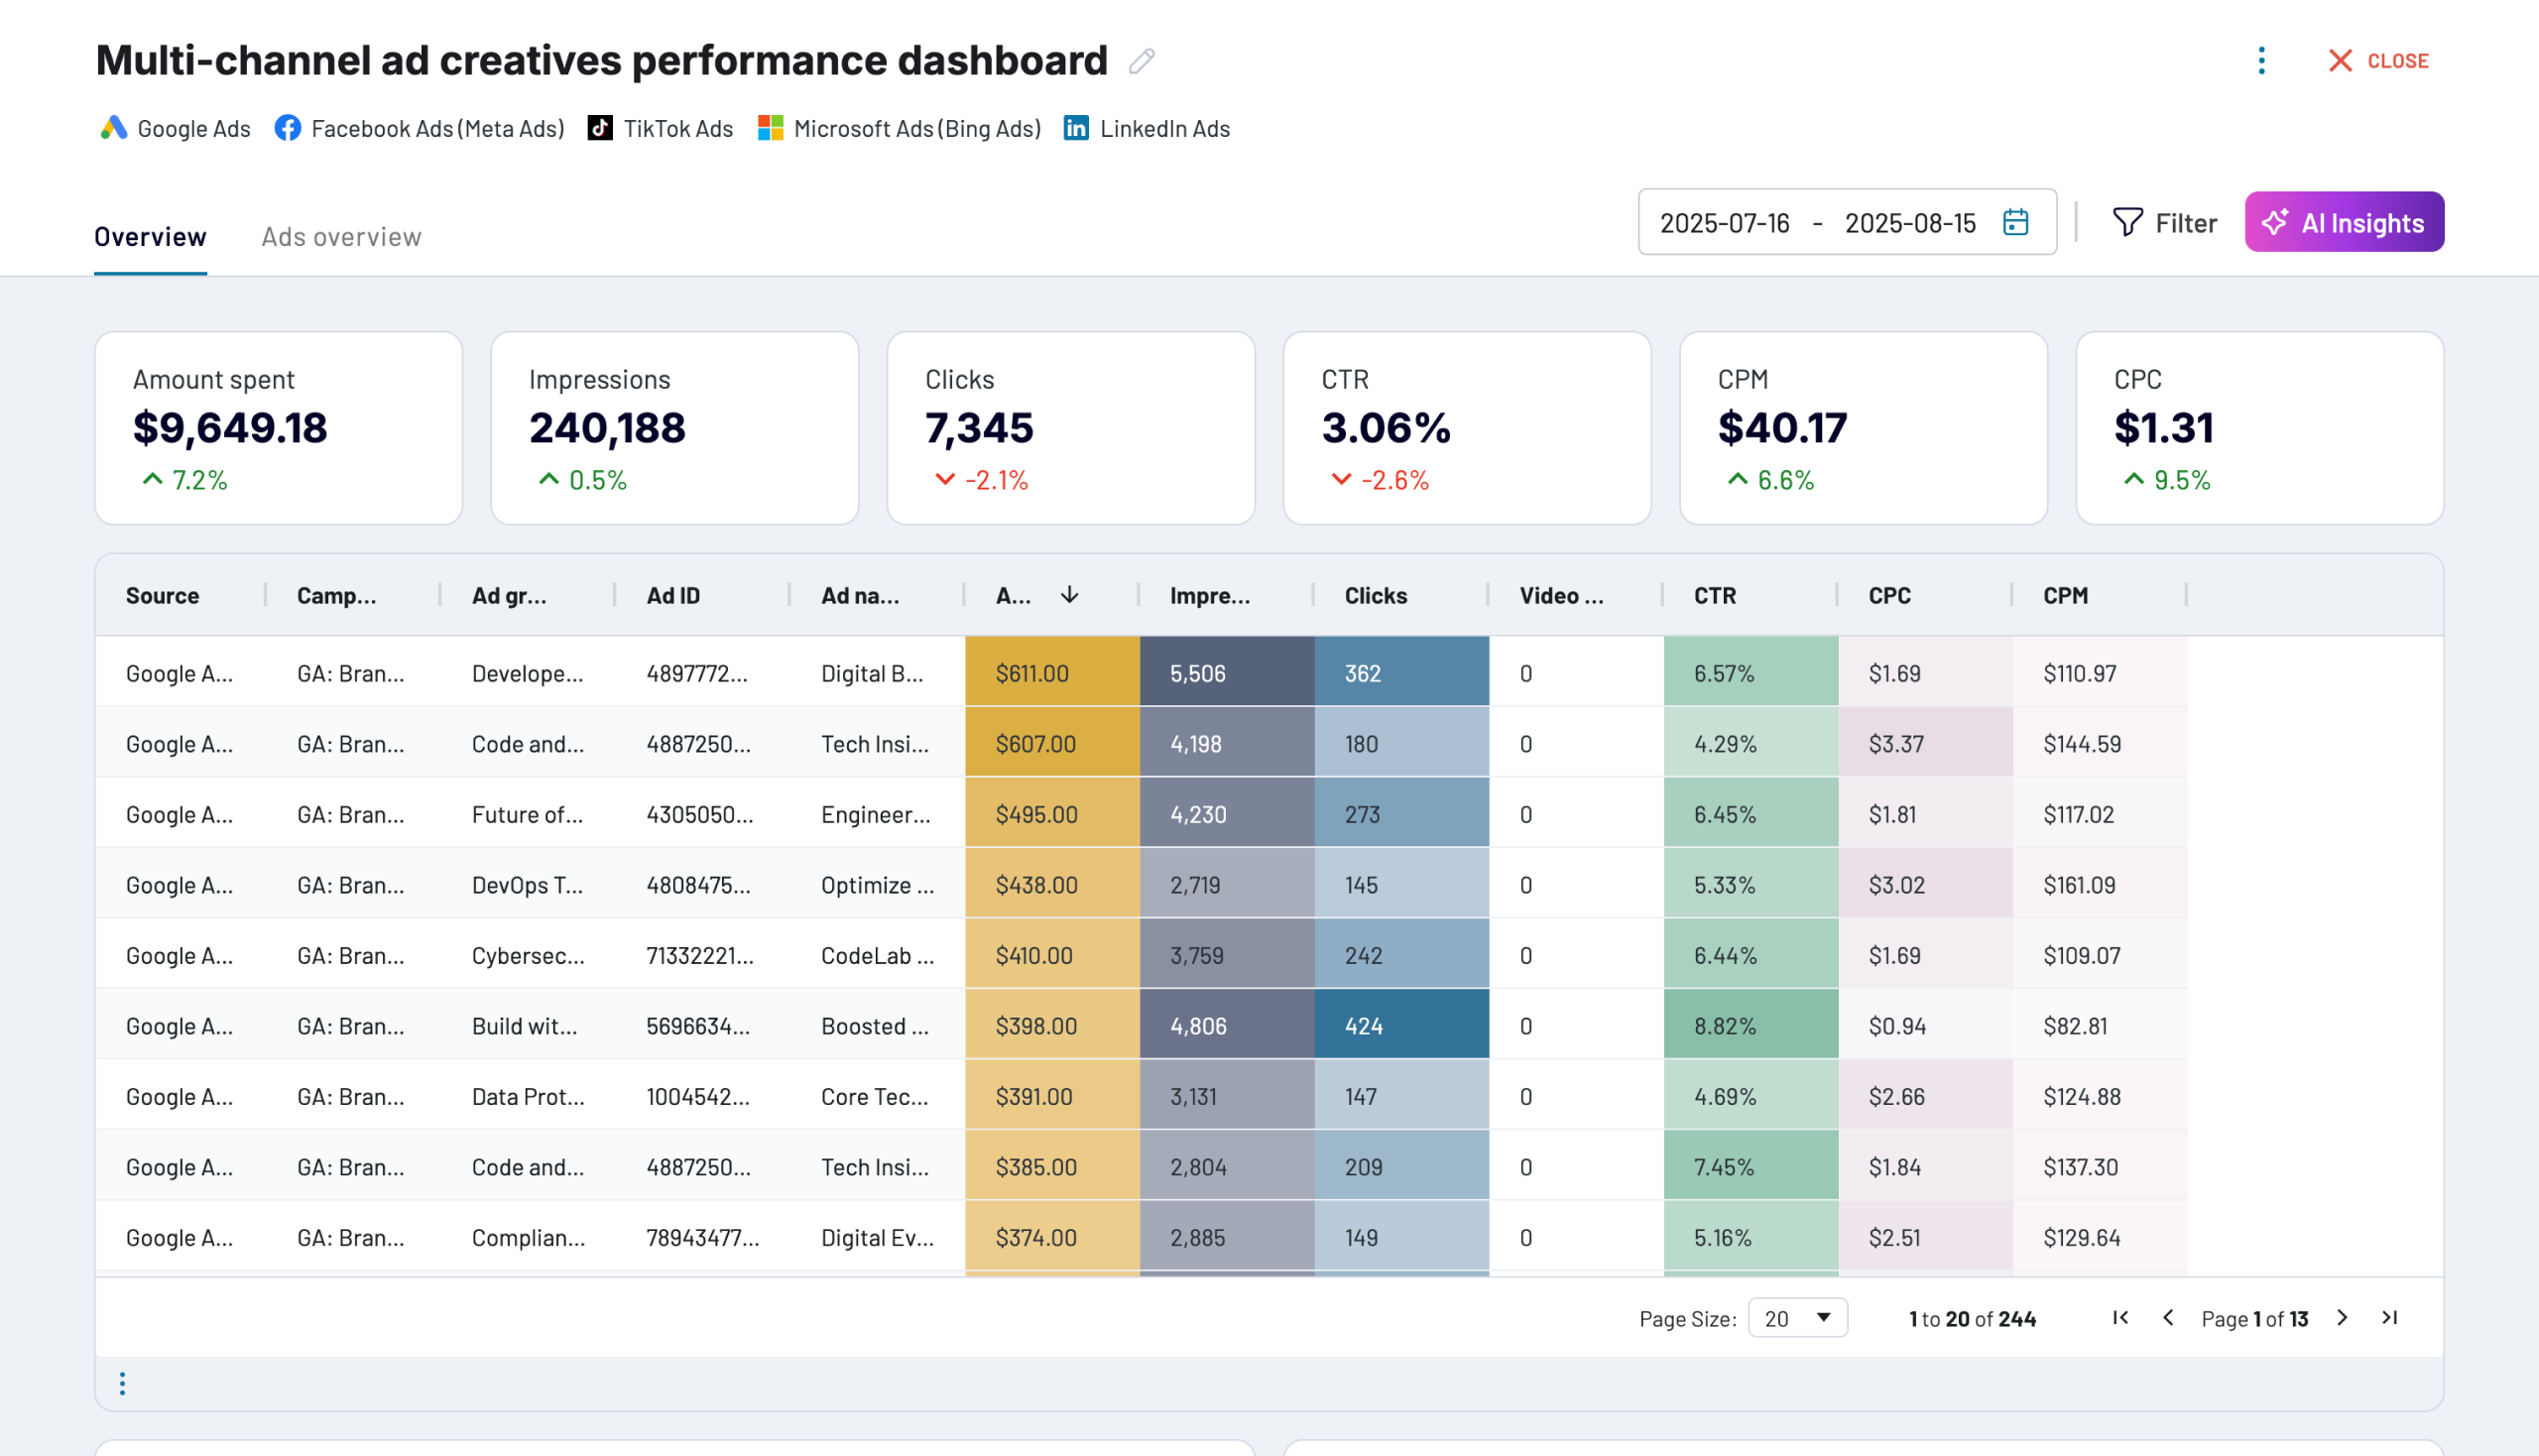
Multi-channel ad creatives performance dashboard


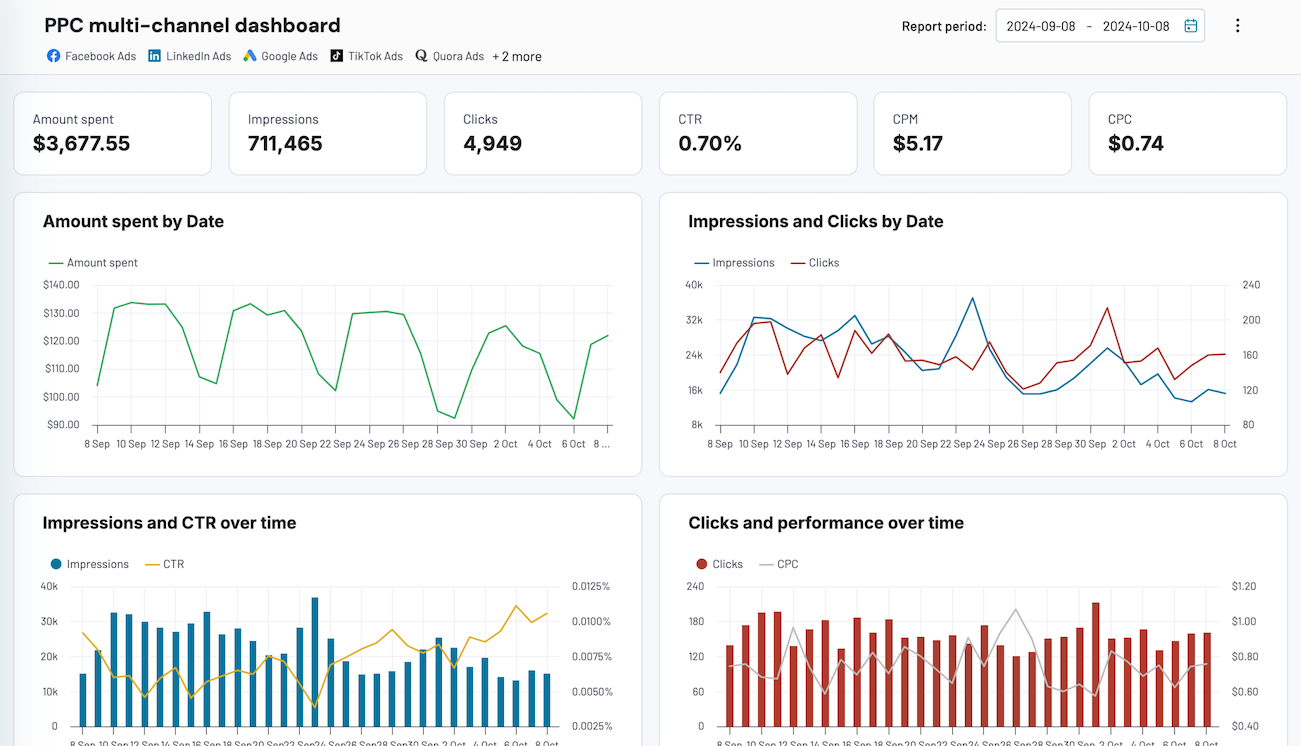
PPC multi-channel dashboard


 +3
+3

All-in-one marketing dashboard


 +6
+6
No such template is available yet.
No worries. Our team will create a template that fits your needs, just tell us more
about your case. It doesn't cost you a penny 😉
Request a custom report
about your case. It doesn't cost you a penny 😉
Export Jira to Power BI automatically with just a few clicks.
Connect similar Project Management apps and get data in minutes


What to export from Jira to Power BI

Custom JSQ queries of issues
Use JQL (Jira Query Language) to export customized issue reports that align with your specific needs. JQL lets you filter precisely the data relevant to your goals. It's helpful if you need to track task progress, identify overdue issues, or gather sprint insights. This ensures you analyze critical information to improve project outcomes and decision-making.
Filtered issues
Filtered issues allow you to segment and export the most relevant data within your Jira projects. Create filters for teams, status, or priority to optimize reporting and simplify issue tracking. With the exported data, you can quickly identify bottlenecks and prioritize tasks for more effective project management.
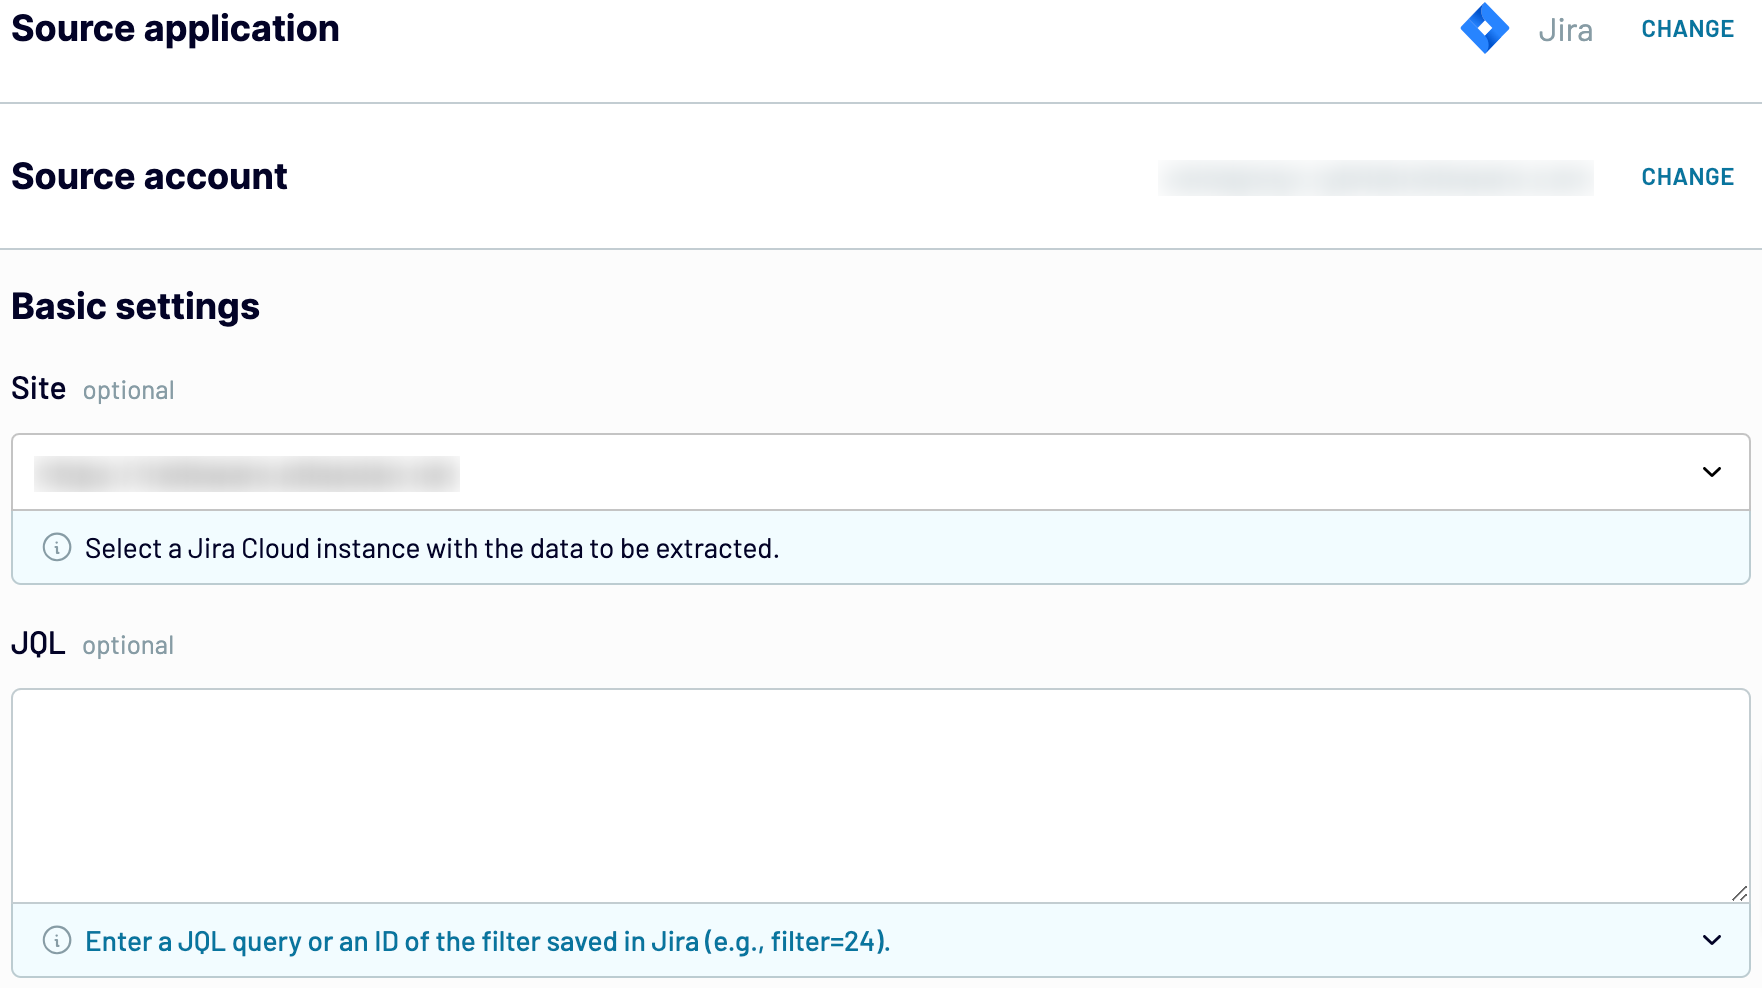
How do you connect Jira to Power BI?
Step 1. Connect your Jira account.
Step 2. Organize and transform data before loading it into Power BI.
Step 3. Connect your Power BI account and copy the integration URL to the desktop app.
Step 4. Schedule automated refreshes to export Jira to Power BI at desired intervals.
Pricing plans
- Monthly
- Annual (save 25%)
Your data is secured by industry standards
 Google Cloud
Certified
 SOC 2 Type II
Certified
 GDPR
GDPRCompliant
 HIPAA
HIPAACompliant
Don’t just take our word for it


How to connect Jira to Power BI (detailed guide)
To connect Jira to Power BI and further import data, follow the step-by-step guide below:
Step 1: Collect data
First, connect your Jira account. Next, you can adjust the optional settings. For example, you'll be offered the option to specify a Jira Cloud instance with data you'd like to export, choose particular columns to load, etc.
As soon as you're done with the source settings, proceed to the transformations step.
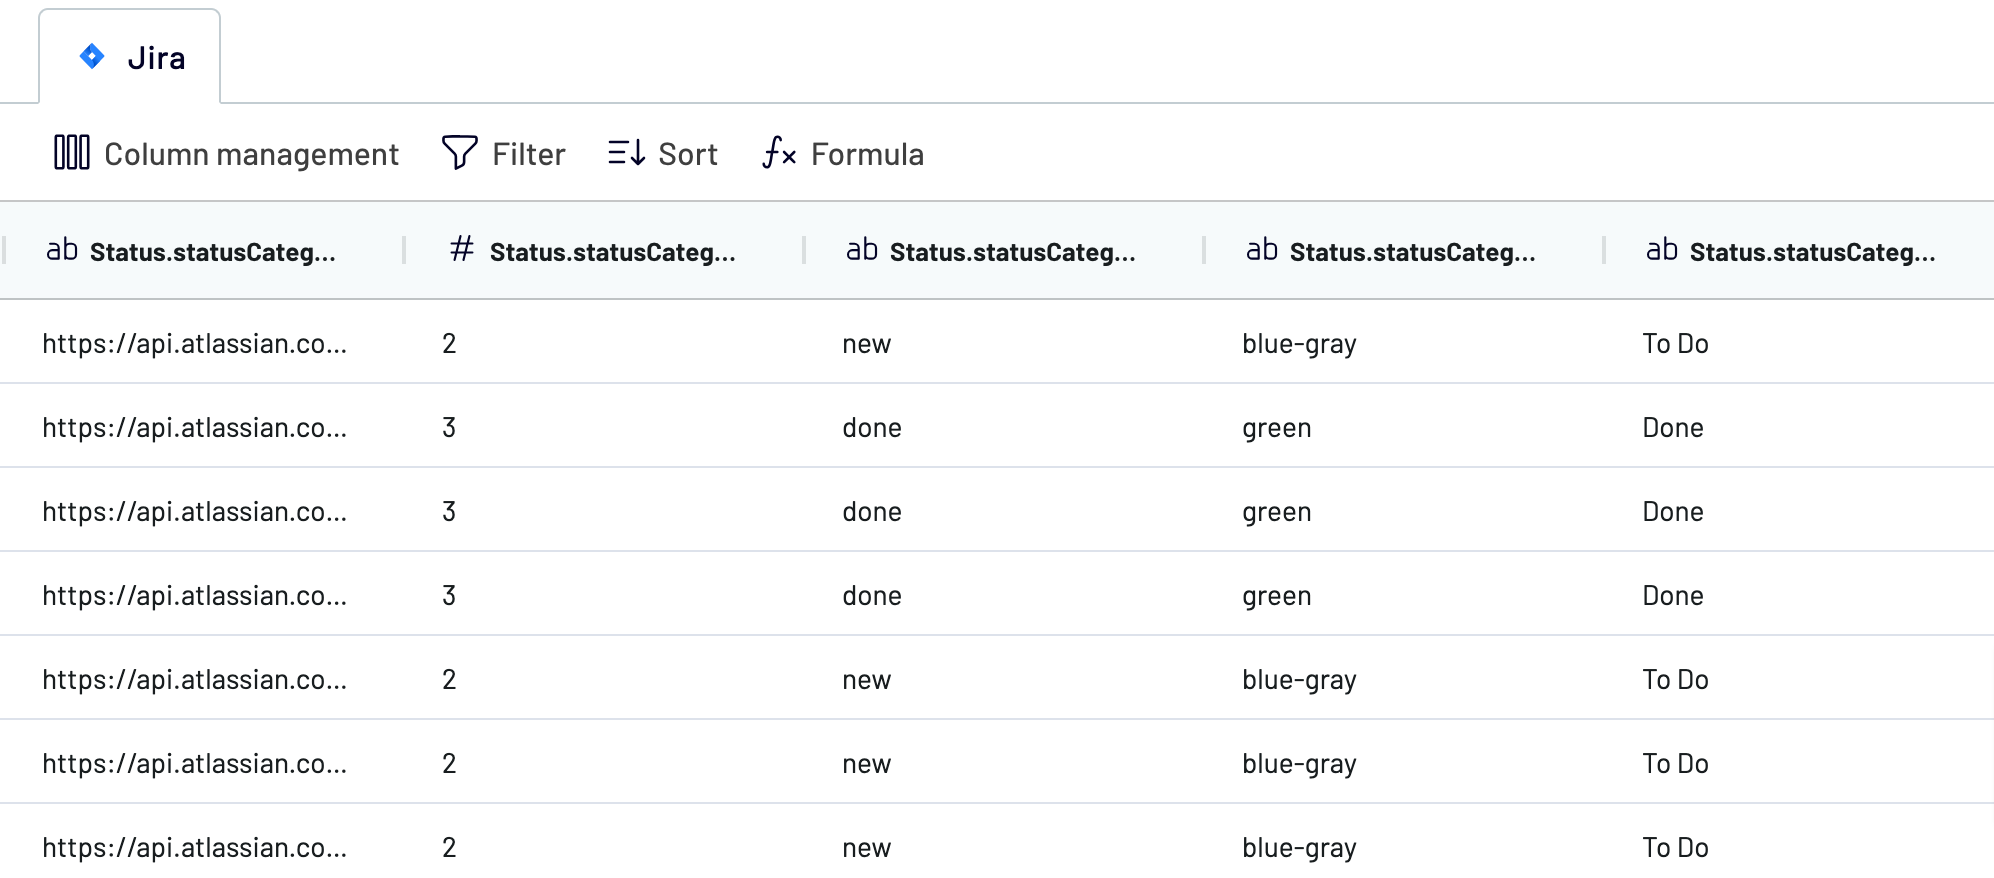
Step 2: Organize and transform
Before importing Jira to Power BI, you can preview your data to verify whether it's correct. If there's something you would like to change, consider making the following transformations to your data:
Once you've made sure the data satisfies your needs, move to the destination settings.
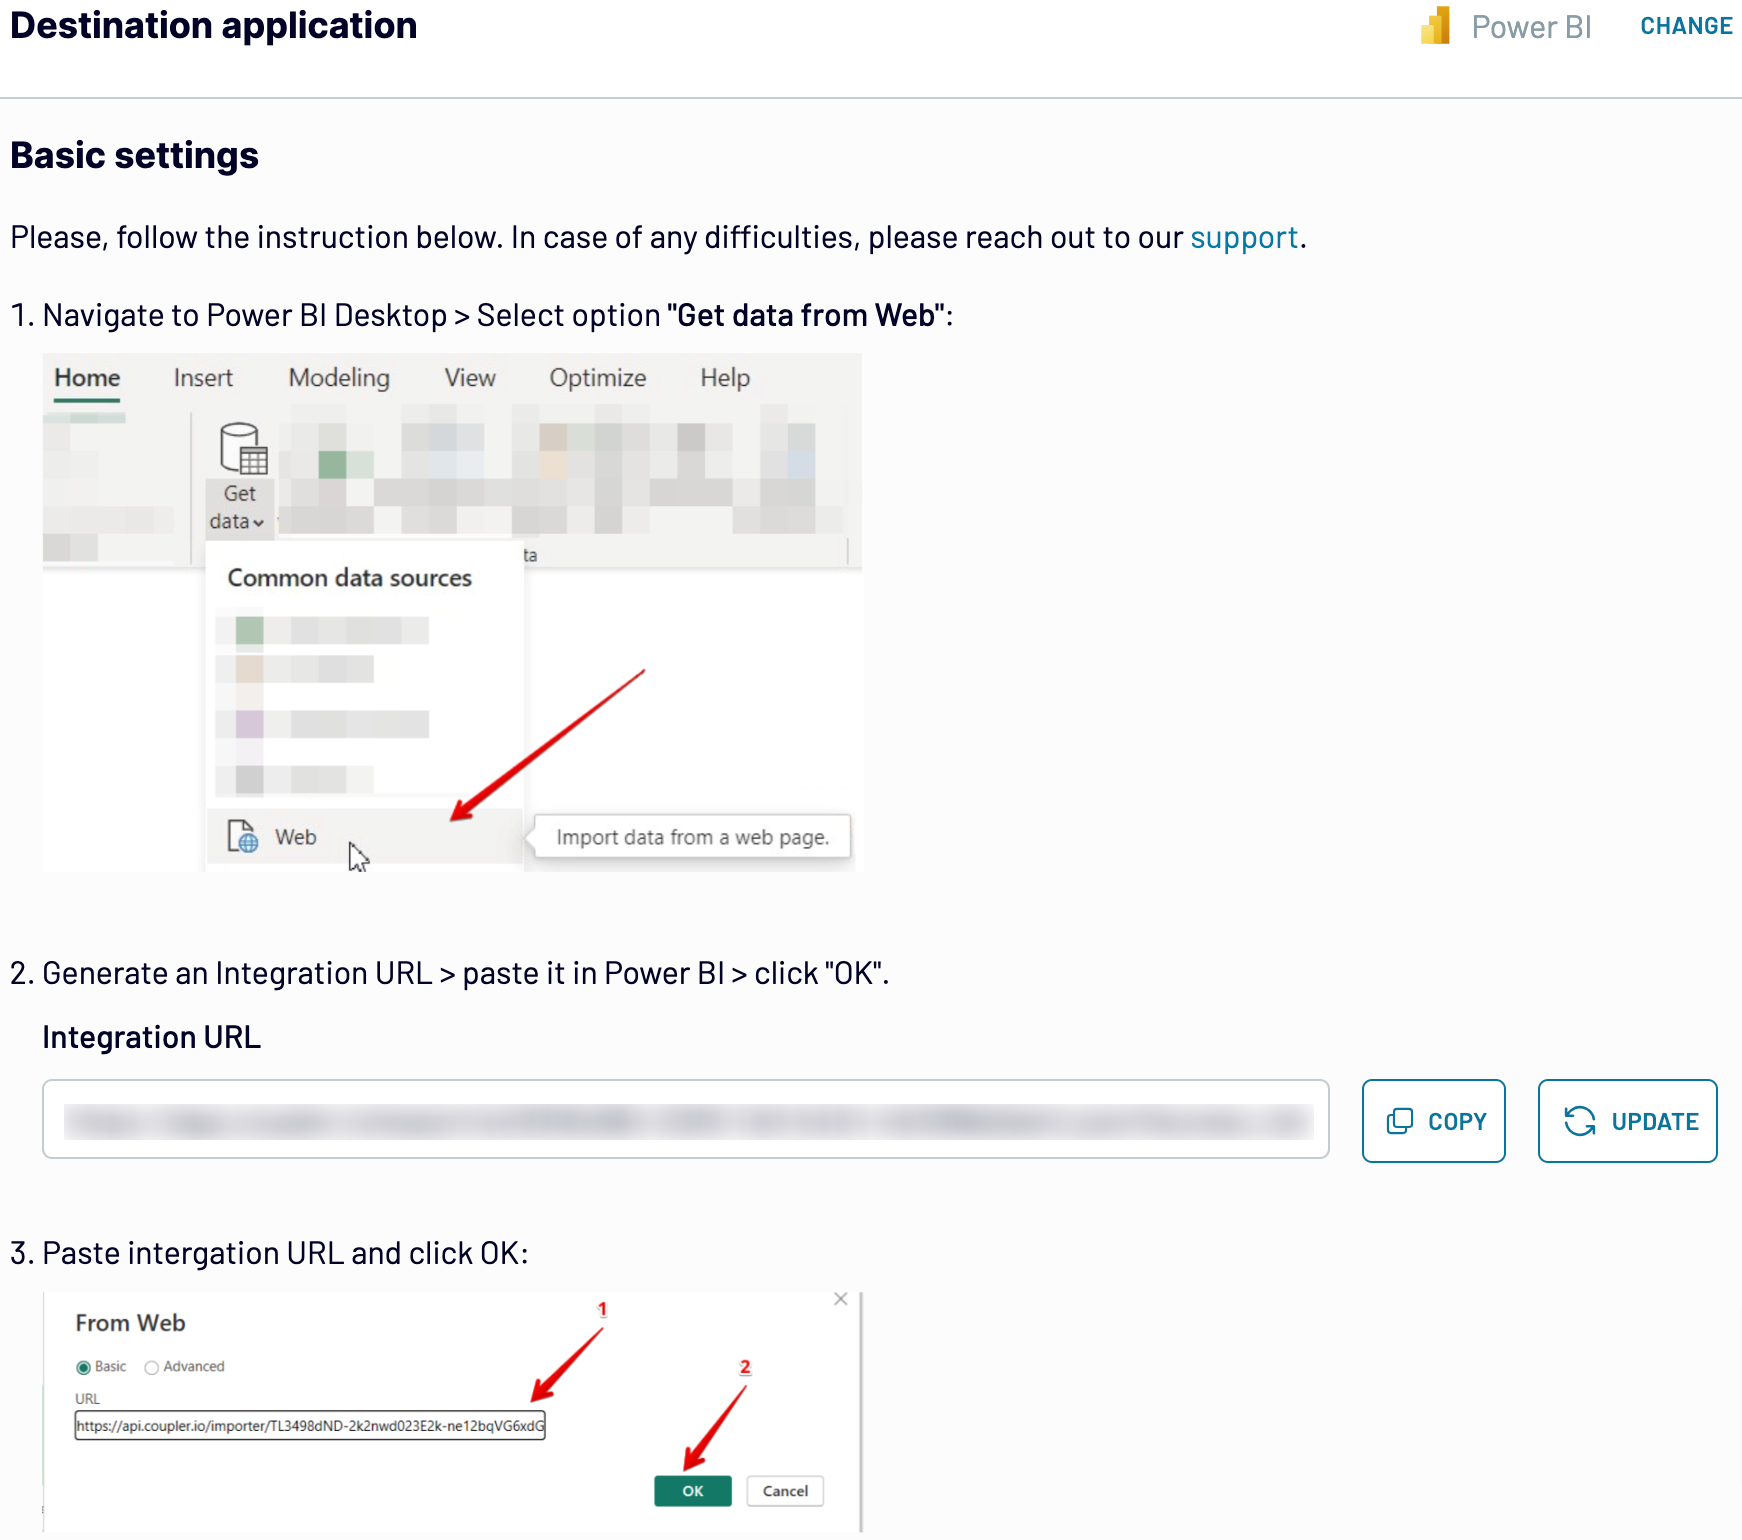
Step 3: Load and automate
To finally transfer your data from Jira to Power BI, follow the in-app instructions to do the following:
After that, proceed to activate the Automatic data refresh functionality and select the frequency for report updates. Lastly, save and run the importer to complete this process.
Step 1: Collect data
First, connect your Jira account. Next, you can adjust the optional settings. For example, you'll be offered the option to specify a Jira Cloud instance with data you'd like to export, choose particular columns to load, etc.
As soon as you're done with the source settings, proceed to the transformations step.
Step 2: Organize and transform
Before importing Jira to Power BI, you can preview your data to verify whether it's correct. If there's something you would like to change, consider making the following transformations to your data:
- Edit, rearrange, hide, or add columns.
- Apply various filters and sort your data.
- Create new columns with custom formulas.
- Combine data from multiple accounts or apps.
Once you've made sure the data satisfies your needs, move to the destination settings.
Step 3: Load and automate
To finally transfer your data from Jira to Power BI, follow the in-app instructions to do the following:
- Generate the integration URL.
- Paste it into the Power BI desktop app.
After that, proceed to activate the Automatic data refresh functionality and select the frequency for report updates. Lastly, save and run the importer to complete this process.
Export Jira to Power BI and automate it on schedule
To keep your Power BI report in sync with the latest changes to the source, turn on automated data refreshes. This feature ensures that your report dynamically updates itself without manual intervention. You have the flexibility to adjust the frequency of these updates to suit your specific needs. Choose from a range of options such as monthly, daily, hourly, and even intervals as short as every 30 or 15 minutes.
Additionally, you can specify which days of the week the refresh should occur, your preferred time slots, and the time zone.
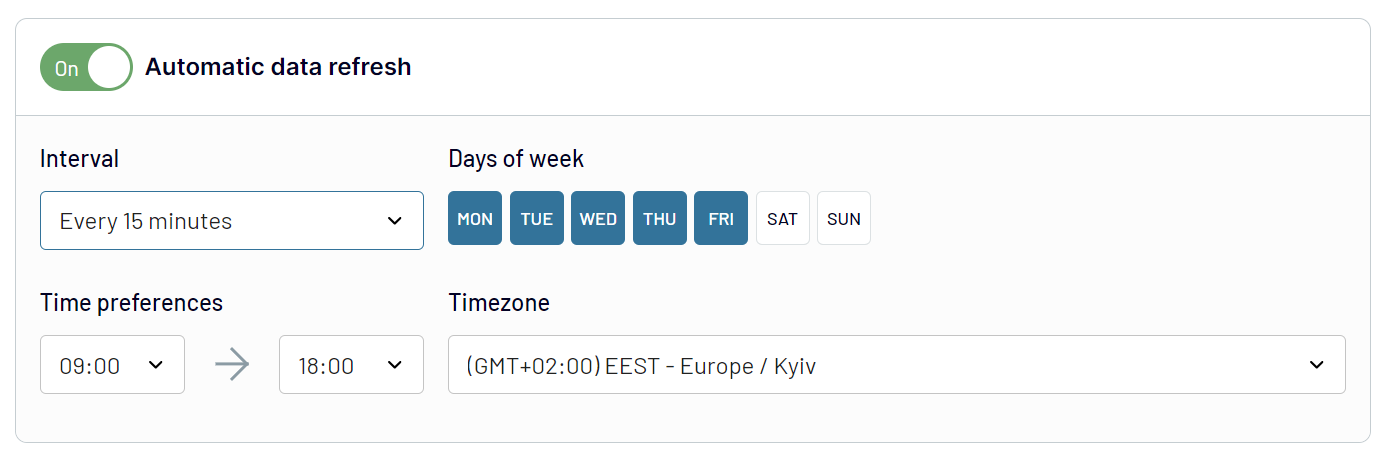
By scheduling these auto-refreshes, you guarantee that your report provides the most recent data. It empowers you to make informed decisions based on time-relevant insights.
Additionally, you can specify which days of the week the refresh should occur, your preferred time slots, and the time zone.
By scheduling these auto-refreshes, you guarantee that your report provides the most recent data. It empowers you to make informed decisions based on time-relevant insights.
Replace or append the data you export from Jira to Power BI
Coupler.io not only enables you to load data from Jira but also exports relevant records from many more apps. To use this opportunity, you have to connect one more source by clicking on the corresponding button while adjusting the source settings.
Next, you'll need to go through a setup process that is similar to configuring the initial data source. By doing so, you'll be able to link various source applications, including multiple accounts within the same app.
Additionally, Coupler.io offers a cross-platform data blending capability. Using it, you'll be able to integrate Jira data with information from other sources.
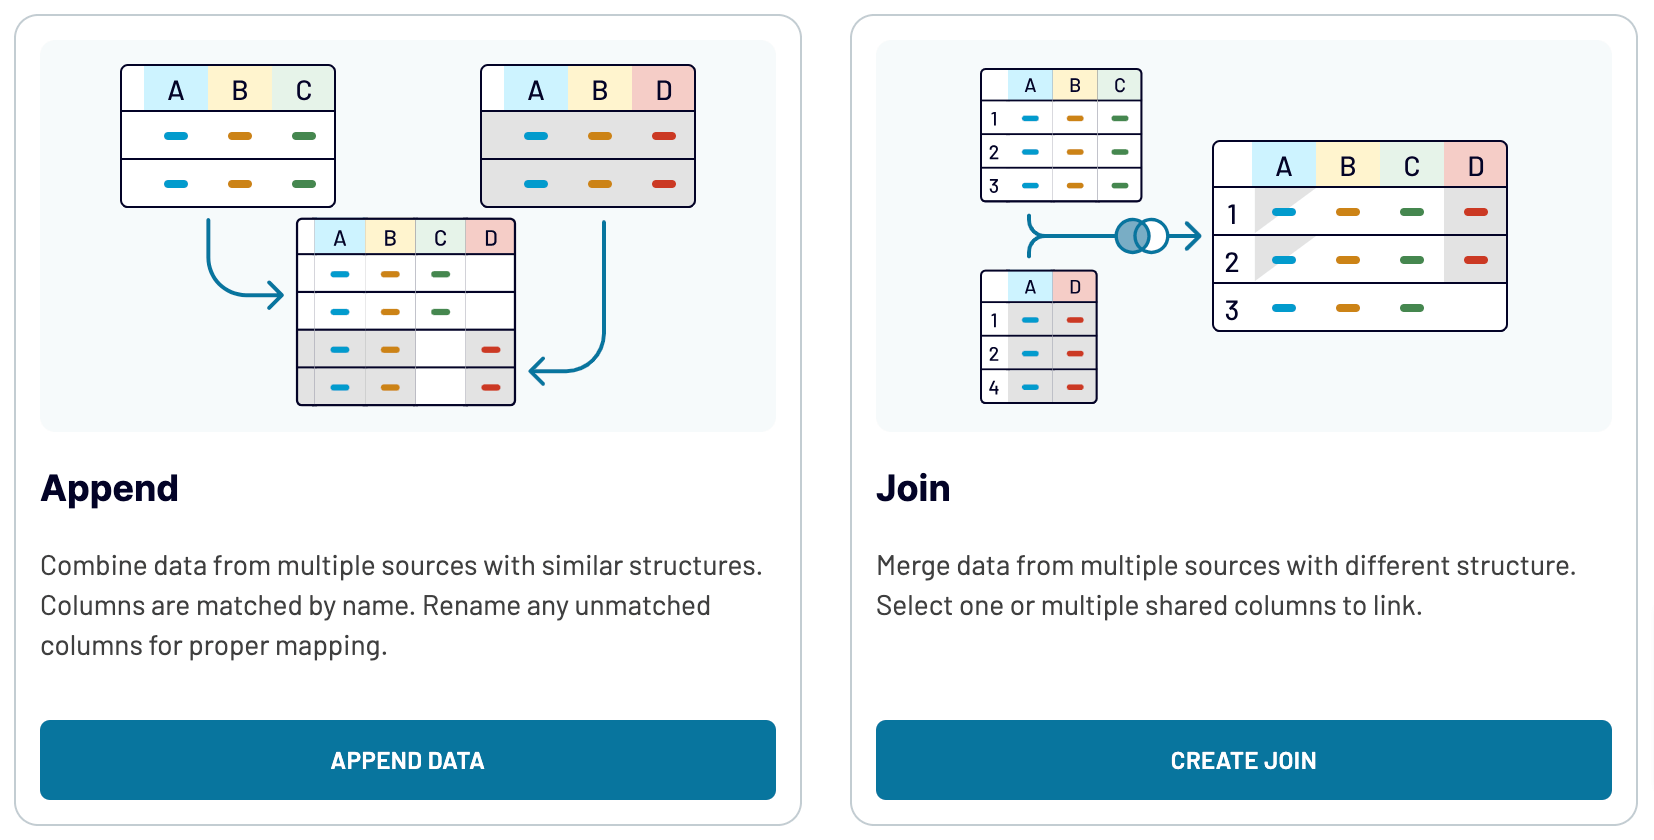
Once you've connected your preferred data sources and progressed to the transformations step, you'll be offered two options to blend your data:
If you add multiple sources, including marketing platforms, CRM apps, and others, you'll expand analytics and, therefore, see the bigger picture of your data.
Next, you'll need to go through a setup process that is similar to configuring the initial data source. By doing so, you'll be able to link various source applications, including multiple accounts within the same app.
Additionally, Coupler.io offers a cross-platform data blending capability. Using it, you'll be able to integrate Jira data with information from other sources.
Once you've connected your preferred data sources and progressed to the transformations step, you'll be offered two options to blend your data:
- Append. It involves merging elements from one source into another, requiring identical column names.
- Join. By choosing this mode, you'll combine datasets side by side with at least one column of the same name.
If you add multiple sources, including marketing platforms, CRM apps, and others, you'll expand analytics and, therefore, see the bigger picture of your data.
Export Jira to Power BI or another destination
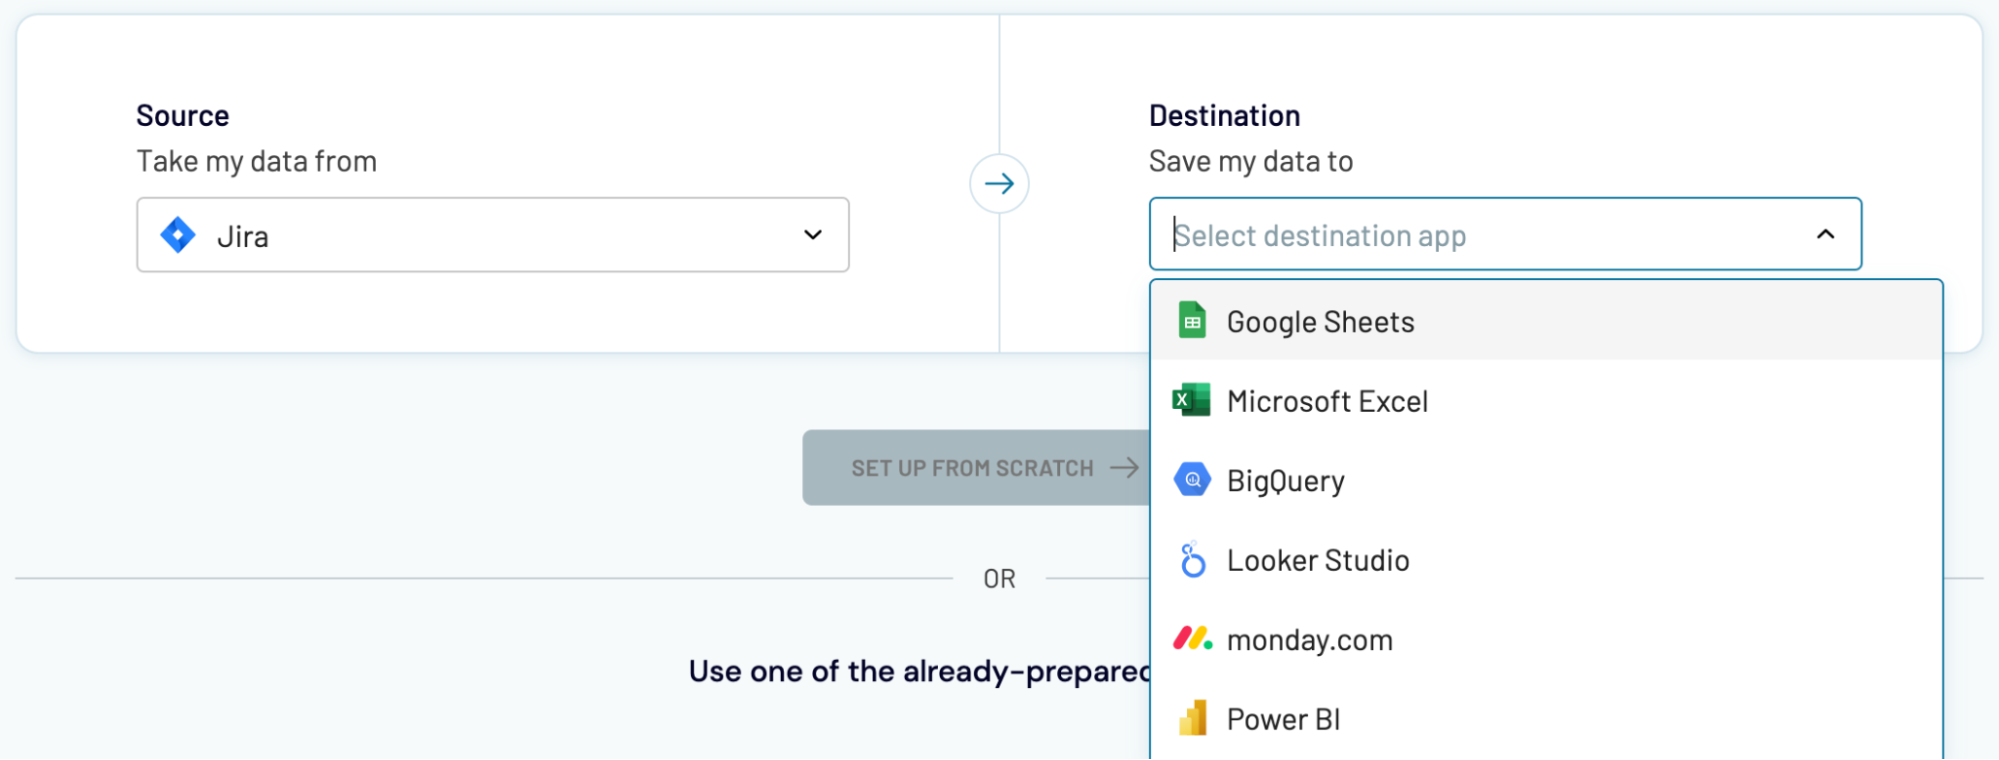
Apart from the capability to connect Jira to Power BI, Coupler.io empowers you to replicate data importers and add a broad array of alternative applications:
Importing Jira data into Power BI, as demonstrated previously, is essentially no different from loading it into other destinations.
- Add spreadsheet applications – Microsoft Excel and Google Sheets – to create reports on your data in a quick and simple manner.
- Send your Jira records to data warehousing software – BigQuery, PostgreSQL, or Redshift – to store, query, and perform complex analysis of those.
- Enjoy the benefits of visual analytics with other business intelligence (BI) tools – Looker Studio, Tableau, and Qlik Sense: transform data into interactive dashboards, make it easier to grasp, and identify trends and patterns in it.
Importing Jira data into Power BI, as demonstrated previously, is essentially no different from loading it into other destinations.